
Custom Programs
Creating Custom Programs in CR Essentials
Overview
Custom Programs allow you to build instructional programs that cannot be created by simply cloning a program from the CR Elements Library.
While cloned programs let you customize existing content, they do not allow you to modify the program's structure. For example, if a library program contains three instructional steps, the cloned version will also contain three steps. If your teaching protocol requires five steps instead, you'll need to create a Custom Program.
Custom Programs are created using the Excel template provided in CR Essentials and then uploaded into your organization's library.
It has to be Excel, not Google Sheets, as this program changes the format when exported to .xsl
Before You Begin
From the Admin view, navigate to:
Settings → Behavior Analysis → Programs → Add Custom Program
On this page, you'll find:
- The Custom Program requirements
- The downloadable Excel template
- The upload section
Select Use this Excel template to upload your program.
Although the template opens in Excel Online, we recommend downloading it and editing it using the desktop version of Microsoft Excel for a better editing experience.
Step 1: Understand the Program Hierarchy
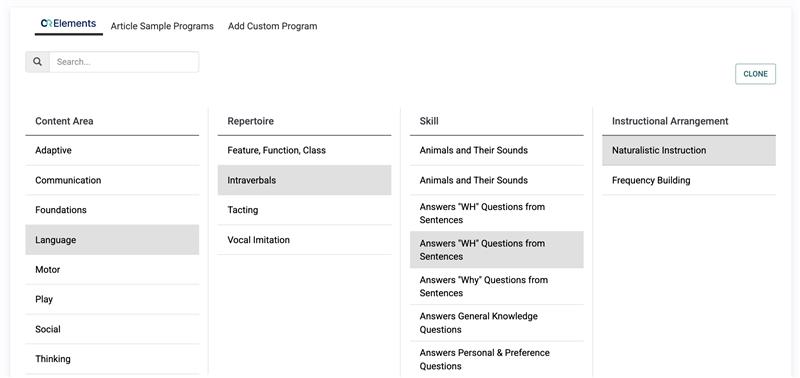
Every Custom Program follows the same hierarchy used in the CR Elements library.
Content Area
    ↓
Repertoire
    ↓
Skill
    ↓
Instructional Arrangement
    ↓
Steps
    ↓
Targets
Each level builds upon the previous one.
Using a Language Skill example:
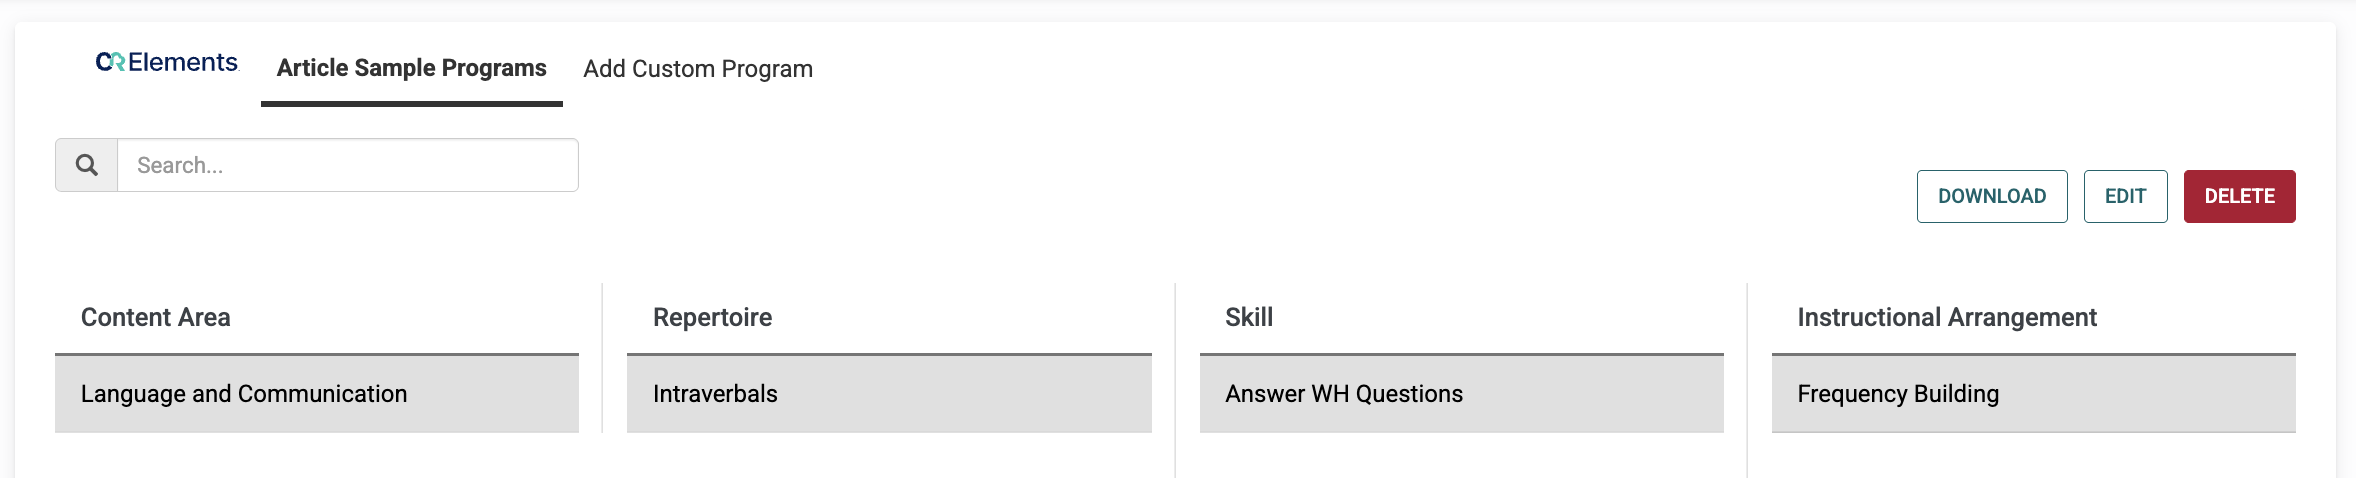
- Content Area: Language and Communication
- Repertoire: Intraverbals
- Skill: Answer WH Questions
- Instructional Arrangement: Frequency Building
- Steps: Teach the skill in smaller learning objectives
- Targets: Individual questions used for data collection
Thinking through this hierarchy before completing the spreadsheet makes the process much easier.
Step 2: Complete the Required Information
The required fields (highlighted in green in the spreadsheet) define the overall program.
For our example, complete the following:
| Field | Example |
|---|---|
| Content Area | Language and Communication |
| Content Area Description | Language and Communication Skills |
| Repertoire | Intraverbals |
| Skill | Answer WH Questions |
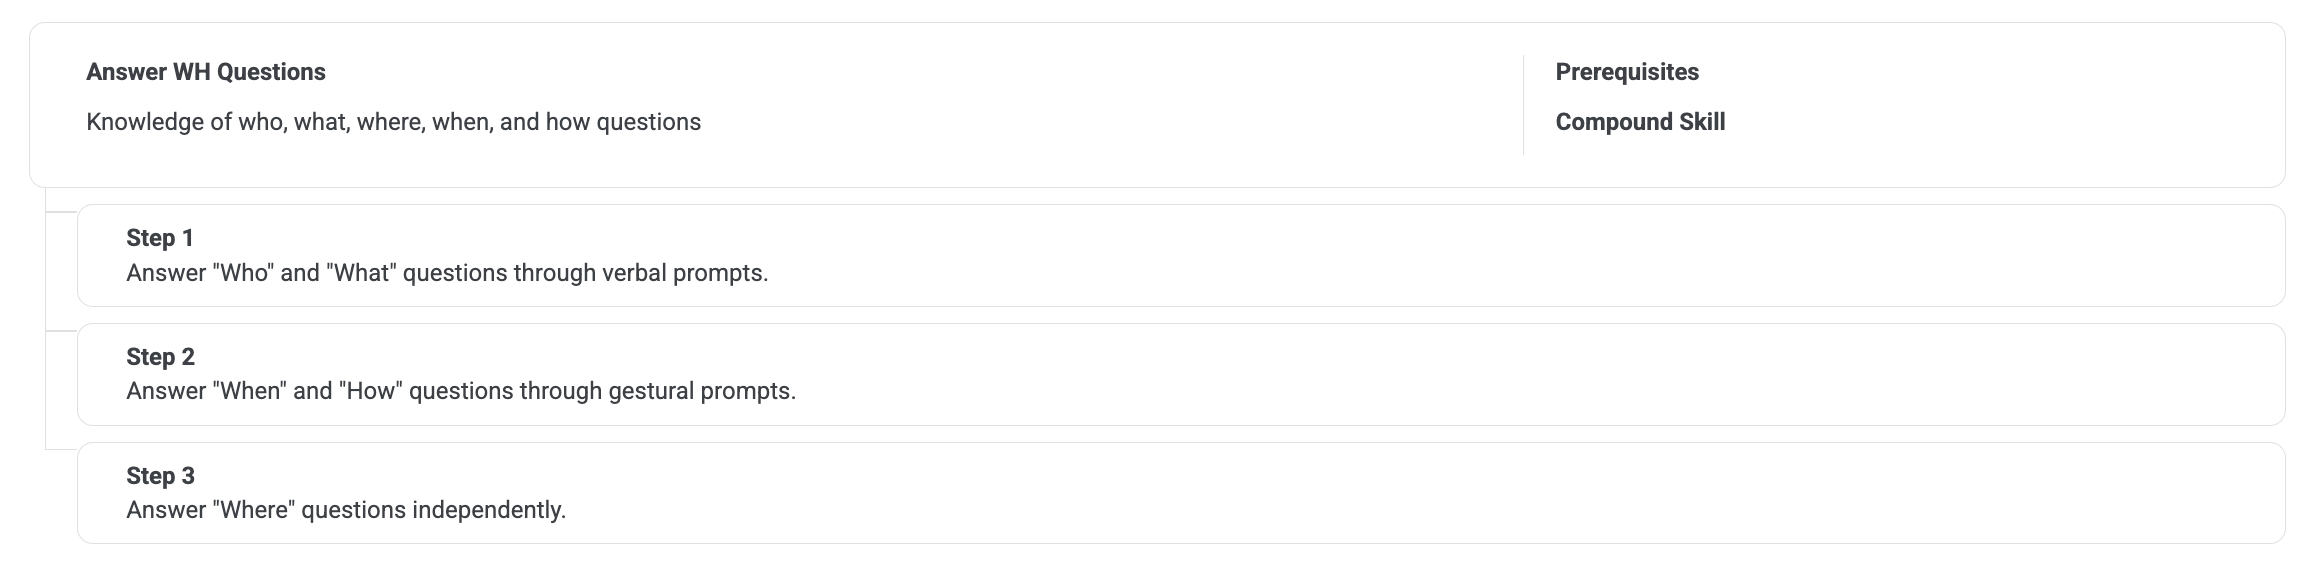
| Skill Description | Knowledge of who, what, where, when, and how questions |
These values remain the same for every instructional step belonging to this skill.

Step 3: Choose the Instructional Arrangement
Select the instructional arrangement that best represents how the learner will be taught.
Available options include:
- Discrete Trials
- Naturalistic Instruction
- Frequency Building
For this example, we'll use:
Frequency Building

- Discrete Trial (DTT): A structured method for teaching one small skill at a time through instructions, practice, and rewards.
- Naturalistic Instruction (NET): Teaching skills during everyday activities and play, using the learner's interests.
- Frequency Building: Repeating a skill to help the learner do it faster, more accurately, and more consistently.
Step 4: Break the Skill into Instructional Steps
Rather than teaching the entire skill at once, divide it into smaller teaching objectives.
Each instructional step represents one level of the teaching progression.
Step 1
Goal/Step_Description
Answer "Who" and "What" questions through verbal prompts.
Example targets:
- Who did that?
- Who is he?
- What was that?
- What is this?

Step 2
Create a new row and copy the program information from the previous step (Copy/Paste columns A2-J2 to A3-J3)
Only update the step-specific information.
Goal/Step_Definition
Answer "When" and "How" questions through gestural prompts.
Example targets:
- When was that?
- How was it?
- How are you?

Step 3
Repeat the process.
Goal/Step_Definition
Answer "Where" questions independently.
Example target:
- Where are you going?
Continue adding rows until your teaching progression is complete.

Step 5: Complete Required System Fields
Some columns exist for system functionality rather than instructional content.
For example:
- Benchmark must always be set to TRUE.
- Most columns between the instructional information and the target columns can be left blank unless your organization requires them.
Leaving optional fields blank will not prevent the program from uploading.

Step 6: Add Targets (Optional)
Targets are the individual items on which therapists collect data.
Although the spreadsheet allows you to pre-populate targets, we generally recommend adding them after assigning the program to a learner.
This provides greater flexibility, as targets often differ between learners.
If you choose to include targets in the spreadsheet, each target should represent one measurable teaching item rather than the overall skill.

Step 7: Repeat for Every Instructional Step
Every instructional step requires its own row.
For each new row:
- Copy the Content Area, Repertoire, Skill, and Skill Description.
- Keep the same Instructional Arrangement.
- Increase the Step Number.
- Update the Step Description.
- Set Benchmark to TRUE.
- Add targets if desired.
Only the instructional content should change between steps.

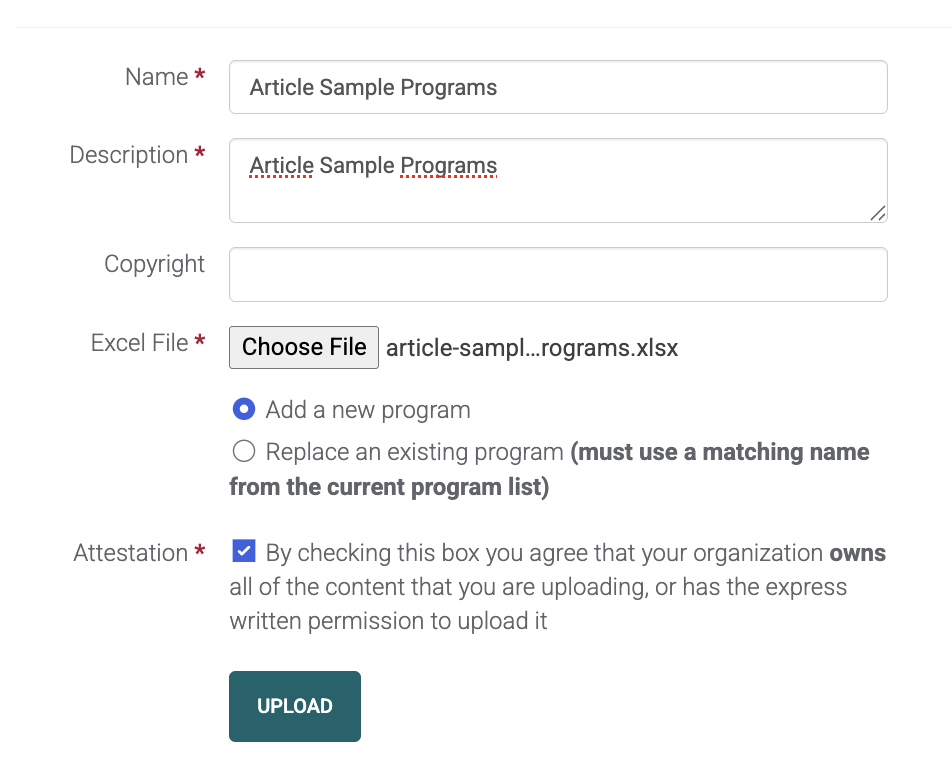
Step 8: Upload the Program
After completing the spreadsheet:
- Return to Add Custom Program under Behavior Analysis.
- Enter a Program Name.
- Add a Program Description.
- Complete the Attestation field.
- Upload the Excel file.
- Save the program.
Once uploaded, your Custom Program becomes part of your organization's library and can be assigned to learners.
Step 9: Edit the Program
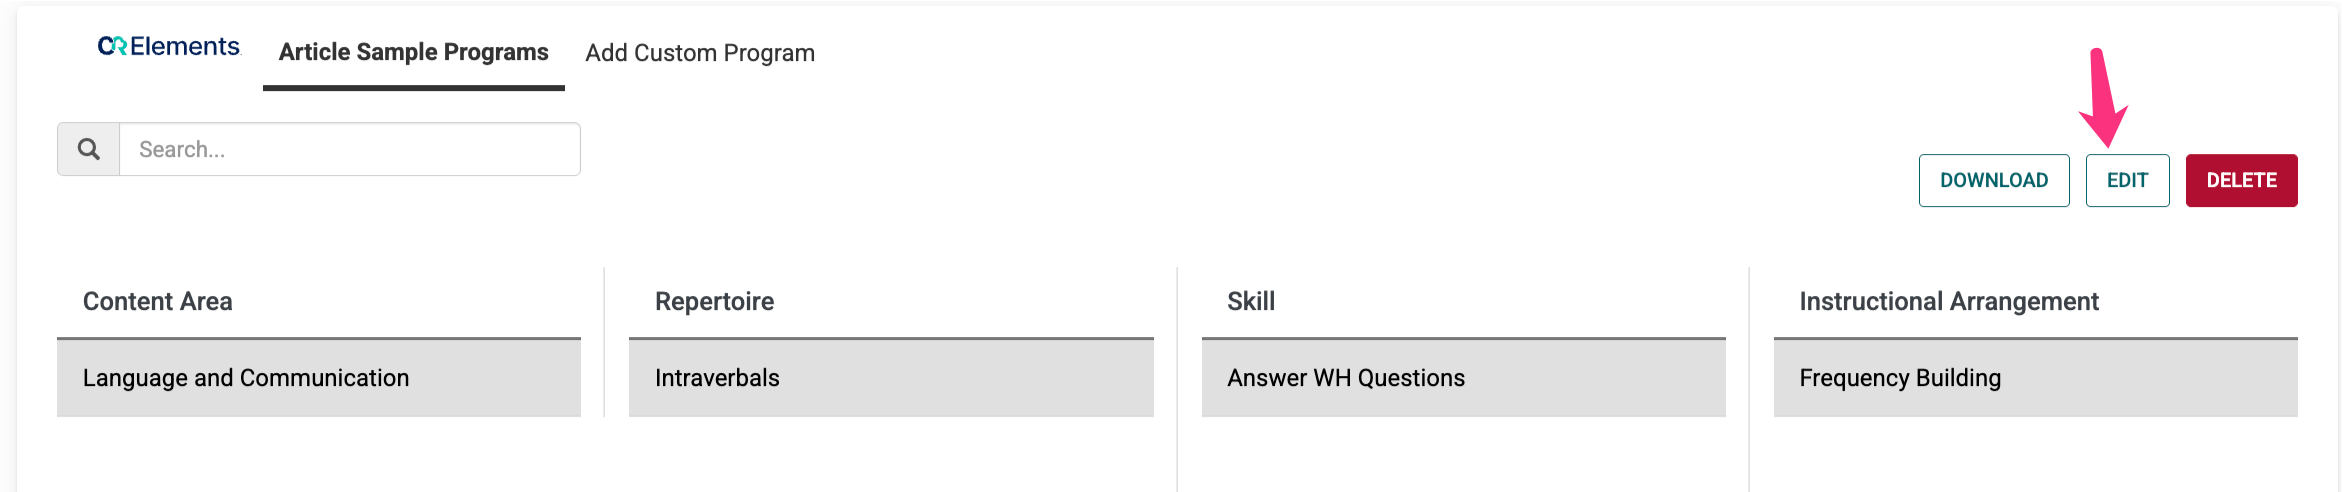
After uploading the spreadsheet, if you still want to make changes, you may click on the Edit button in the top right corner. You can click on the Skill you want to edit; a 'pencil' icon will appear, then you can make changes to Skill Name and Skill Description.


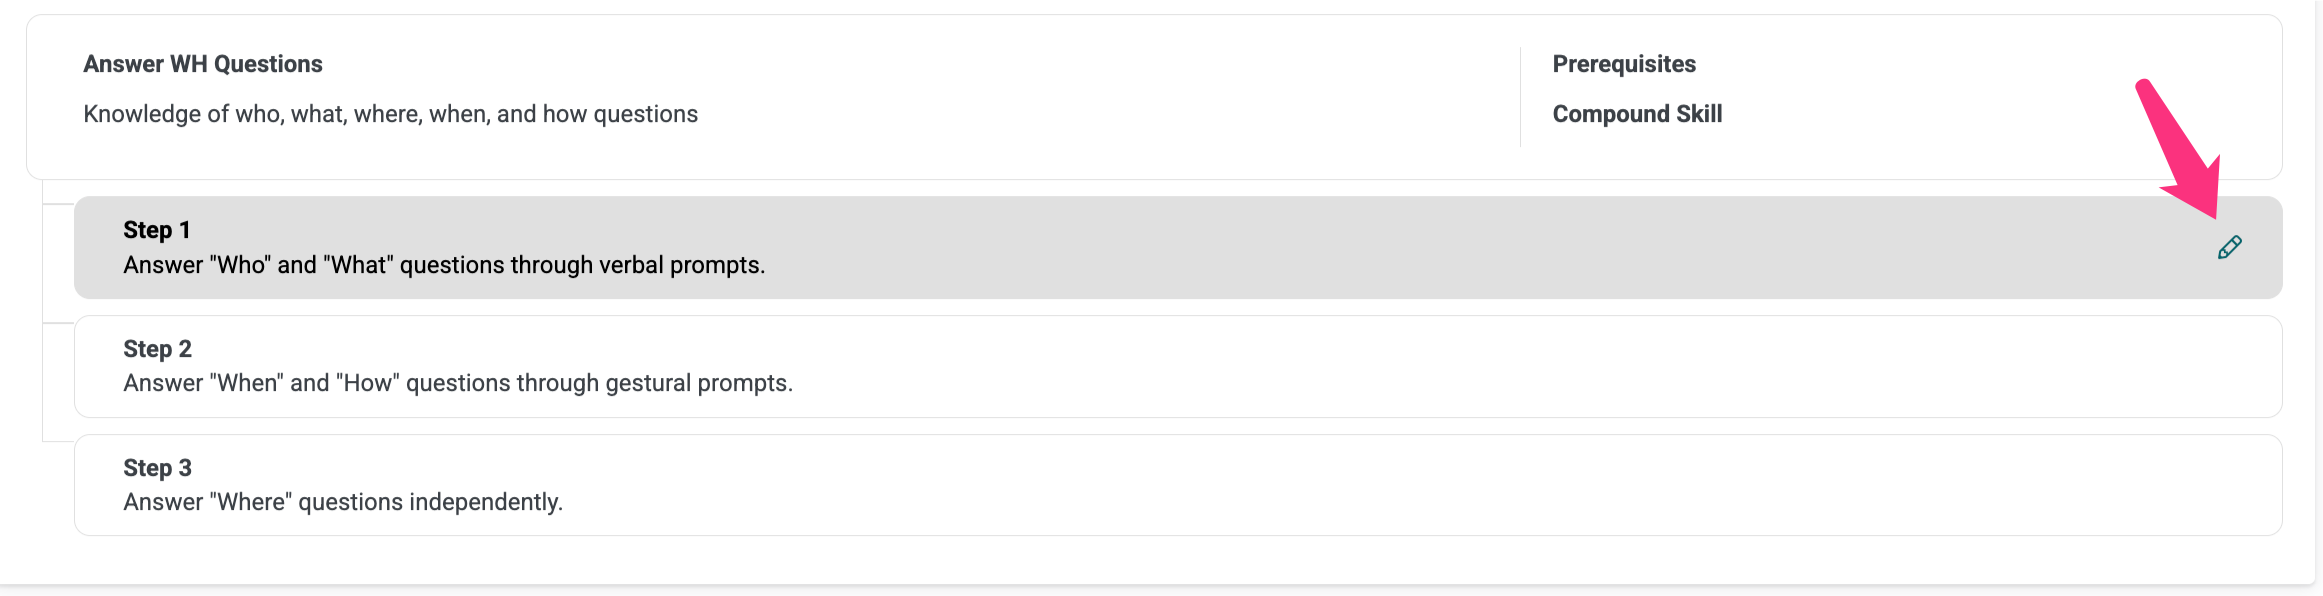
You can also scroll down and click the step you want to edit; a 'pencil' icon will appear to edit the selected step's content.
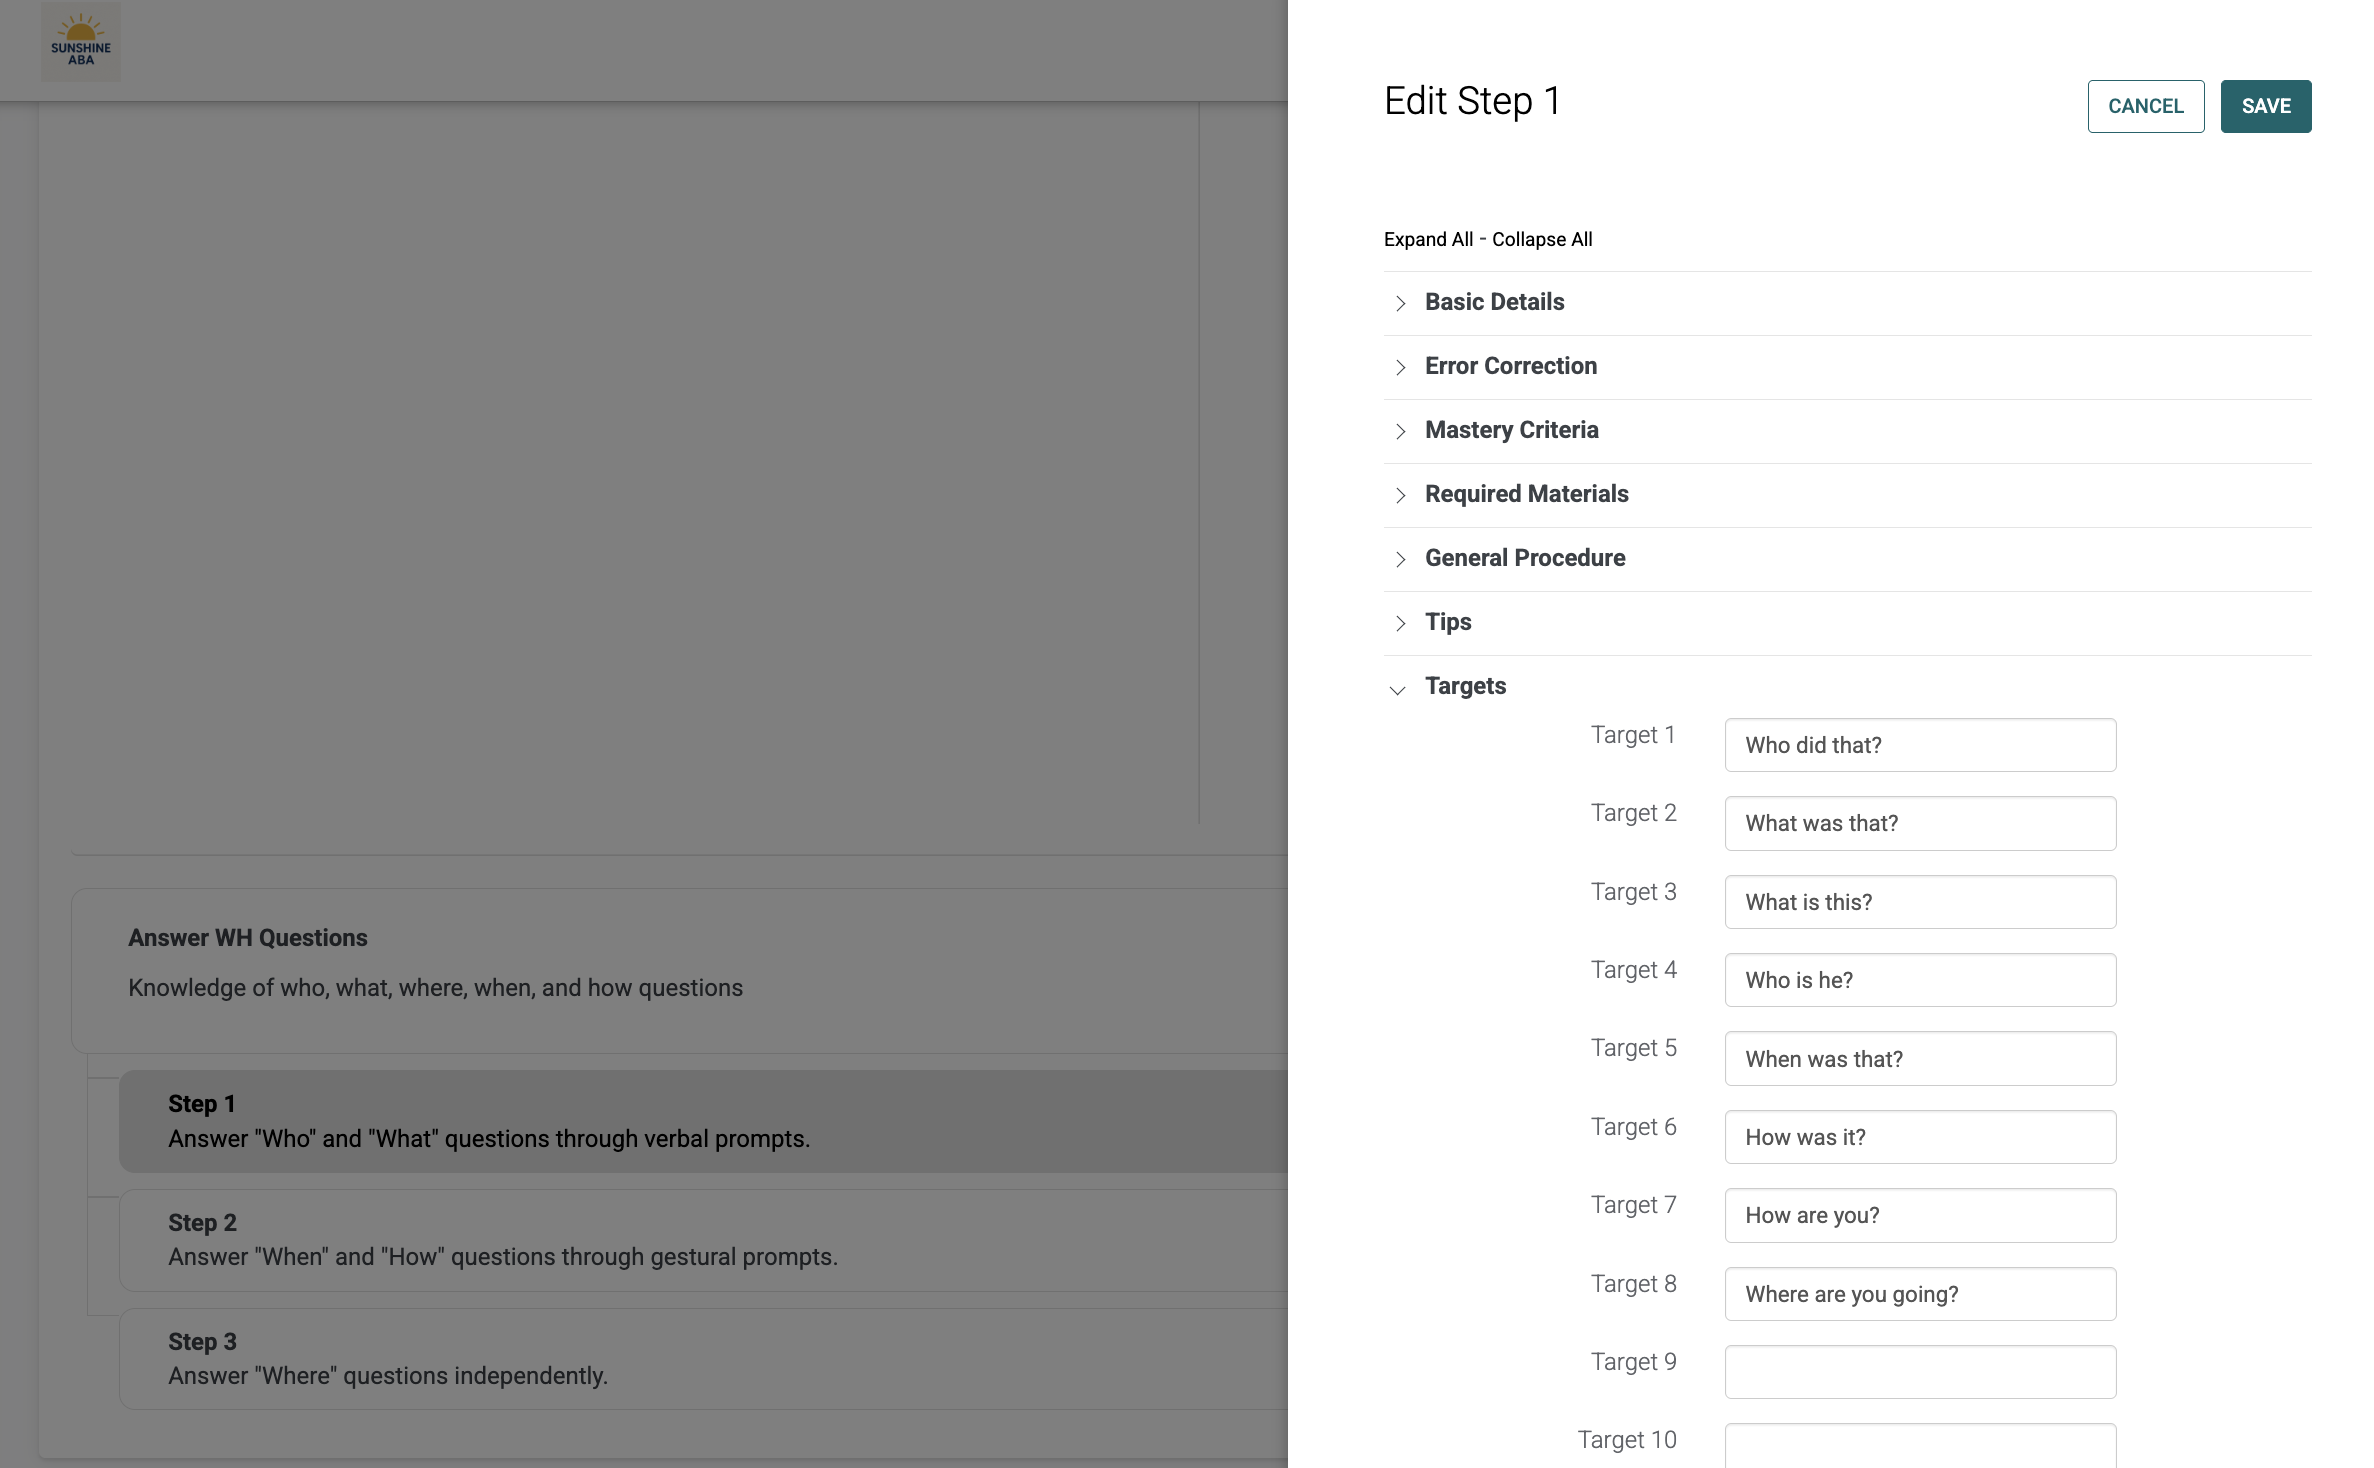
Make sure you click on Save to save the changes.
Best Practices
- Plan the entire teaching progression before creating the spreadsheet.
- Keep Content Areas and Repertoires broad enough to group similar skills.
- Use Skill Descriptions to describe the overall learning objective.
- Use Step Descriptions to describe individual teaching objectives.
- Remember that therapists collect data on targets, not on the overall skill.
- Whenever possible, create targets after assigning the program to a learner to allow for individualized instruction.